General
Settings specified in the Options apply to the entire network and its subnets. When no default values are specified for a subnet, these settings are used instead. Follow these steps to define such values:
- On the Upper Menu bar, click the DHCP tab. On the drop down menu, click DHCPv4 category object, then click Enable toggle to enable DHCPv4 module (if Disable). You will then be directed to the default General page.
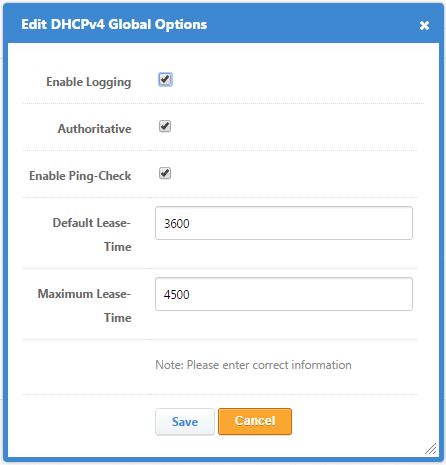
Figure 3.1.1.1-a: General Options
To Enable Logging of DHCP operations, click the checkbox provided.
Click the Authoritative checkbox if you want to make this DHCPv4 server the default server for the network.
NOTE: A network can have multiple DHCPv4 servers for fault-tolerance or high availability. One of them, however, must be designated as authoritative to prevent a situation where multiple servers allocate different IP addresses to a single client.
Click the Enable Ping-Check box in order for the DHCP server to check the availability of the IP address before allocating it to the client.
Specify a Default Lease-Time in weeks, days, hours, minutes or seconds.
NOTE: A Lease-Time is a pre-determined duration that a dynamically allocated IP address may be used by a client. The Default Lease-Time is returned to a client that does not specify a lease duration.
- Enter a Maximum Lease-Time in the next set of boxes.
NOTE: The Maximum Lease-Time is the longest duration that a dynamically allocated IP address may be used by a client. This lease-time is returned to a client that specifies a lease longer than the maximum duration.
- Click the Save button to commit the settings. Otherwise, click Cancel.